
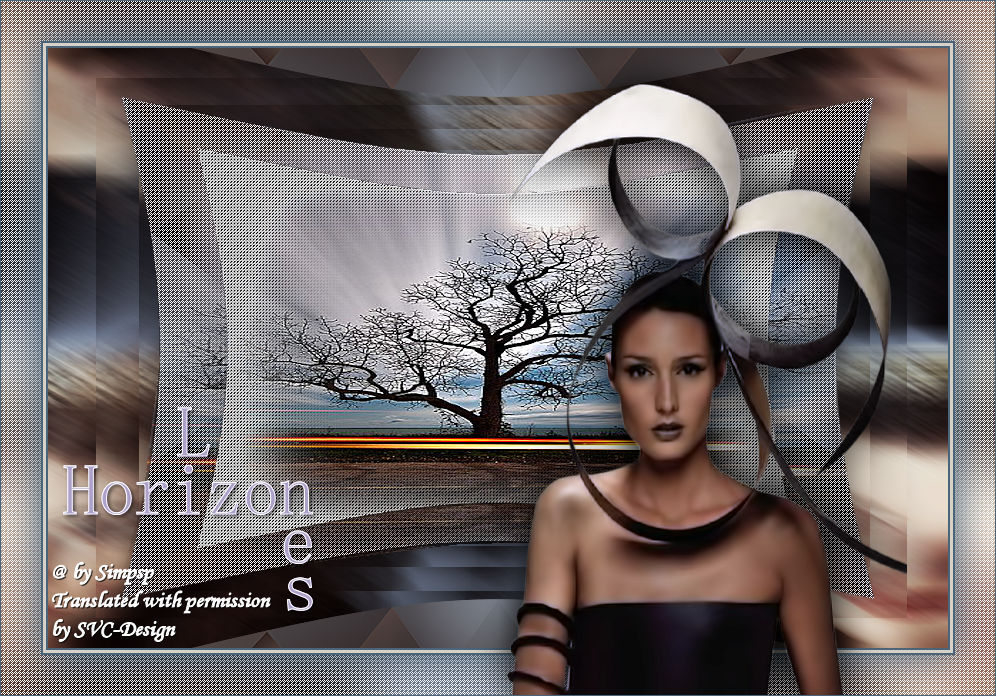
This lesson is made with PSPX9
But is good with other versions.
© by SvC-Design
Materialen Download :
Here
******************************************************************
Materials:
Callitubes-123misted.pspimage
Callitubes-758mulheres.pspimage
Callitubes-819mulheres.pspimage
fangsong.ttf
Hozion_byAnaMariaC.PspSelection
titulo_1.png
******************************************************************
Plugin:
Plugins - Medih - Sorting Tiles
Plugins - Simple - Quick Tile
Simple - Plugins - 4 Way Average
******************************************************************
color palette
:
******************************************************************
methode
When using other tubes and colors, the mixing mode and / or layer coverage may differ
******************************************************************
General Preparations:
First install your filters for your PSP!
Masks: Save to your mask folder in PSP, unless noted otherwise
Texture & Pattern: Save to your Texture Folder in PSP
Selections: Save to your folder Selections in PSP
Open your tubes in PSP
******************************************************************
We will start - Have fun!
Remember to save your work on a regular basis
******************************************************************
1.
Don't forget to save your work often.
2.
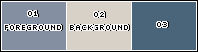
Choose the colors to work with.
01 - Foreground: #848fa2
02 - Background: #d7d1c7
03 - Extra color: #26294a
3.
Open a new transparent image of 900x600px.
4.
Paint transparency with color 01: #848fa2 (Foreground).
Selections - Select All.
5.
Open Callitubes-819mulheres.pspimage
Edit - Copy
Edit - Paste Into Selection.
Selections - Select None.
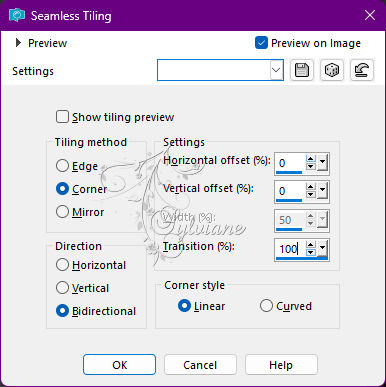
6.
Effects - Image Effects - Seamless Tiling
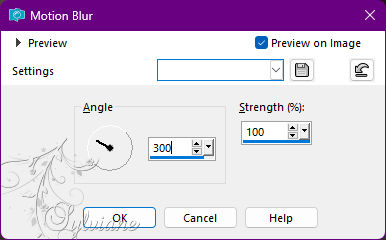
7.
Adjust - Blur - Motion Blur
8.
Adjust - Sharpness - Sharpen More.
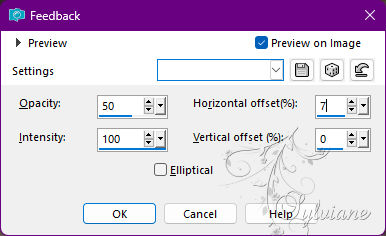
9.
Effects - Reflection Effects - Feedback
10.
Layers - Duplicate.
11.
Blend Mode: Hard Light
Opacity: 40
12.
Layers - Merge - Merge Down.
Layers - Duplicate.
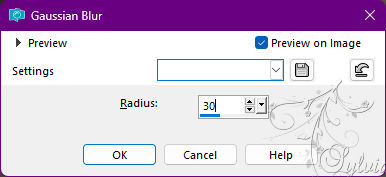
13.
Adjust - Blur - Gaussian Blur
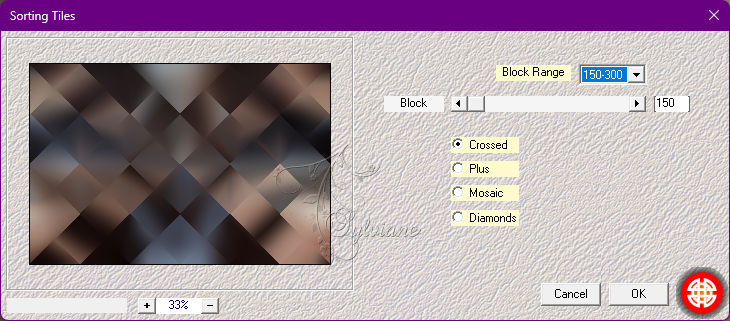
14.
Plugins - Medih - Sorting Tiles
15.
Plugins - Simple - Quick Tile.
16.
Simple - Plugins - 4 Way Average.
17.
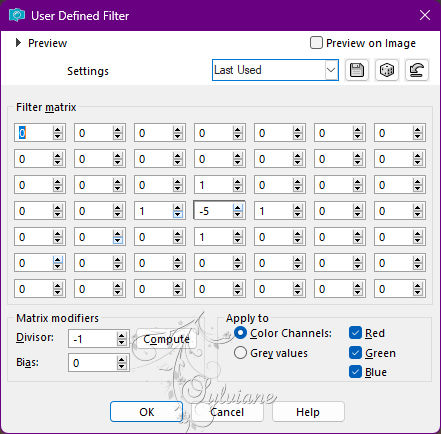
Effects - User Defined Filter - Edge_Enhance
18.
Image - Resize: 90% - Resize all aayers > unchecked.
19.
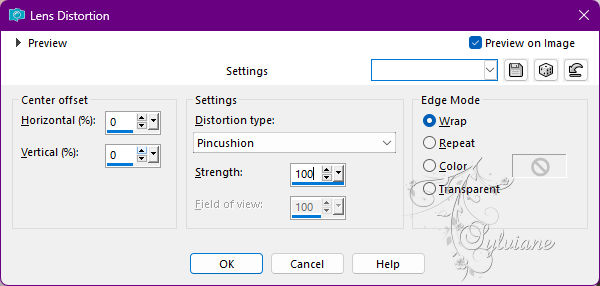
Effects - Distortion Effects - Lens Distortion
20.
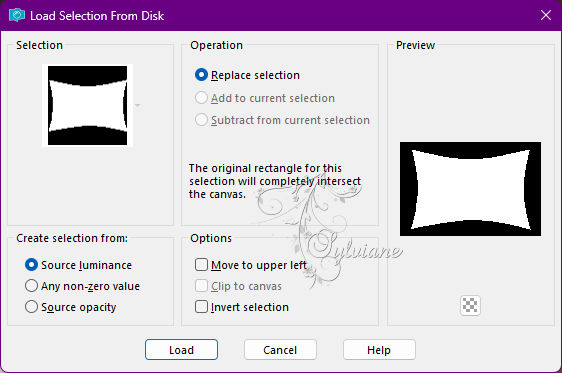
Selections - Load Save/Selection - Load Selection From Disck: Horizon_byAnaMariaC
21.
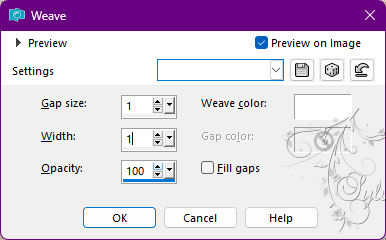
Effects - Texture Effects - Weave
22.
Open Callitubes-123misted.pspimage
Edit - Copy
Edit - Paste Into Selection.
Adjust - Sharpness - Sharpen More.
Selections - Select None.
Layers - Duplicate.
23.
Close the visibility of the Layers Raster 1 and Copy of Raster 1.
Activate the Copy layer (2) of Raster 1.
24.
With the Selection Tool select as in the example
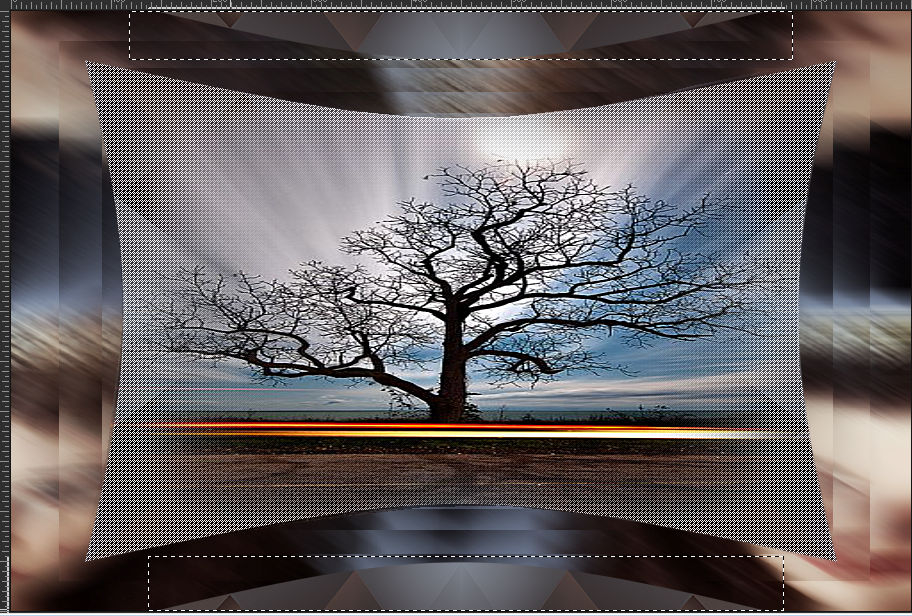
Press the Delete key of the keyboard.
Selections - Select None.
25.
Image - Resize: 80% > Resize all aayers > unchecked.
Adjust - Sharpness - Sharpen.
26.
Open the visibility of Layer Copy of Raster 1.
Layers - Merge - Merge Down.
27.
Effects - 3D Effects - Drop Shadow
0/0/40/40 color:#000000
28.
Enable and open layer raster 1 visibility.
Edit - Copy.
29.
Image – Add Borders –symmetric - 2 px > extra color: #26294a
Image – Add Borders –symmetric - 3px > color: Background: #d7d1c7
Image – Add Borders –symmetric - 2 px > extra color: #26294a
30.
Selections - Select All.
31.
Image – Add Borders –symmetric - 40 px - any color.
Selections - Invert.
Edit - Paste Into Selection.
32.
Adjust - Blur - Gaussian Blur
33.
Effects - Texture Effects - Weave
34.
Selections - Invert.
Effects - 3D Effects - Drop Shadow
0/0/100/60 - Color: #26294a (Extra).
Selections - Select None.
35.
Open the main tubed.
Edit - Copy
Edit - Paste as New Layer.
Resize - Drop Shadow to your liking.
Adjust - Sharpness - Sharpen.
36.
Open titulo_1.pspimage
Edit - Copy
Edit - Paste as New Layer.
Position to your liking.
37.
Image – Add Borders –symmetric - 1 px > extra color: #26294a or other color of your choice.
38.
Apply your watermark or signature
Layer – merge – merge all (flatten)
Save as JPEG
Back
Copyright Translation 2022 by SvC-Design